Hi, I’m Kira DeDecker (“key-ra dee-decker”) and I’m a pet photographer serving Arizona’s greater Phoenix Metro area. Welcome to my blog! This is where I share not only my most recent work but also my life with you. Client sneak peeks, Facebook recaps, announcements, updates, awesome new offerings and the occasional (okay, frequent) story about my crazy but amazing life with my three dogs – Sox, Bixby and Waffles.
Pull up a chair and make sure it’s nice and comfy because you will want to stay awhile. It’s great to have you here!
explore
Gallery
The Experience
Happy Clients
Get in Touch
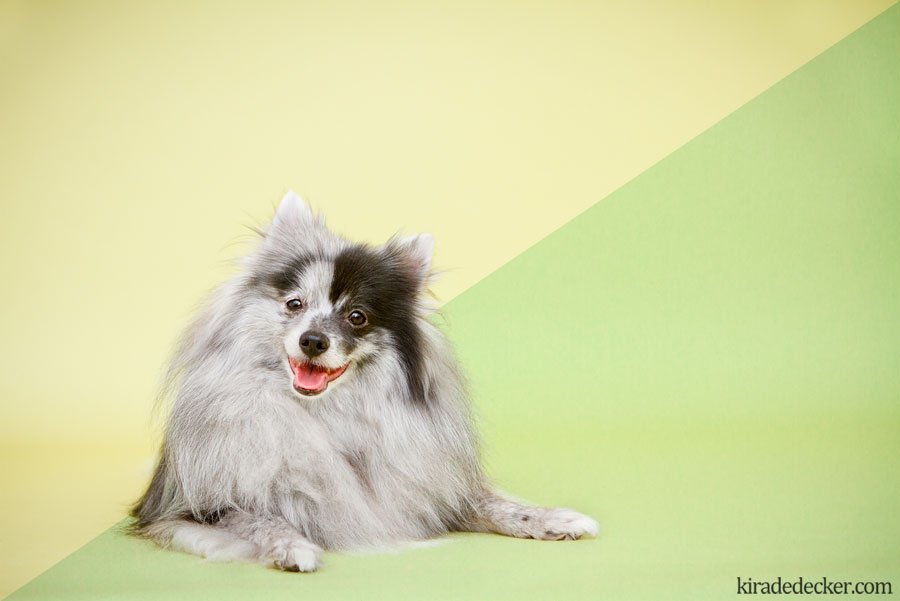
For the walkthrough, I’m going to be using Lightroom (*le gasp*)! Yup, this is my first ever all Lightroom tutorial! A recently goal of mine was to start using Lightroom more for my basic workflow. Now, mind you there are still a lot of things that I prefer or just need to be done with Photoshop still, so I’m not completely ditching PS.
So why do I say this a ‘Simple Color Shift’? Because at no point do I brush, or hand color anything – I simply shift a couple of sliders – which means I can create a preset as well as sync and batch edit my photos. This particular technique works best on big blocks of even color. If you want to do complicated color changes, covering a wide range of hues and custom colors, then that would probably be something that should be done in Photoshop.
Now for this tutorial, I’m going to be using a photo from a session I did with Waffles on what is suppose to be a sea green backdrop. I order all my seamless papers from a local Arizona company called Savage. I have a pamphlet with swatches of the paper of every color they offer and I feel in love with ‘Sea Green’. When it came in the mail, it was perfect, I put it up in my wall-mount, took a few photos and when I uploaded them they were all GOLD! No matter what I did – change the camera profile, tweaked the Camera Calibration, messed with the White Balance, tried natural light vs my speedlite – but the color was always a pee yellow. I suspect that short of using OFC and possibly gels, I am never going to get that ‘Sea Green’, straight out of camera.
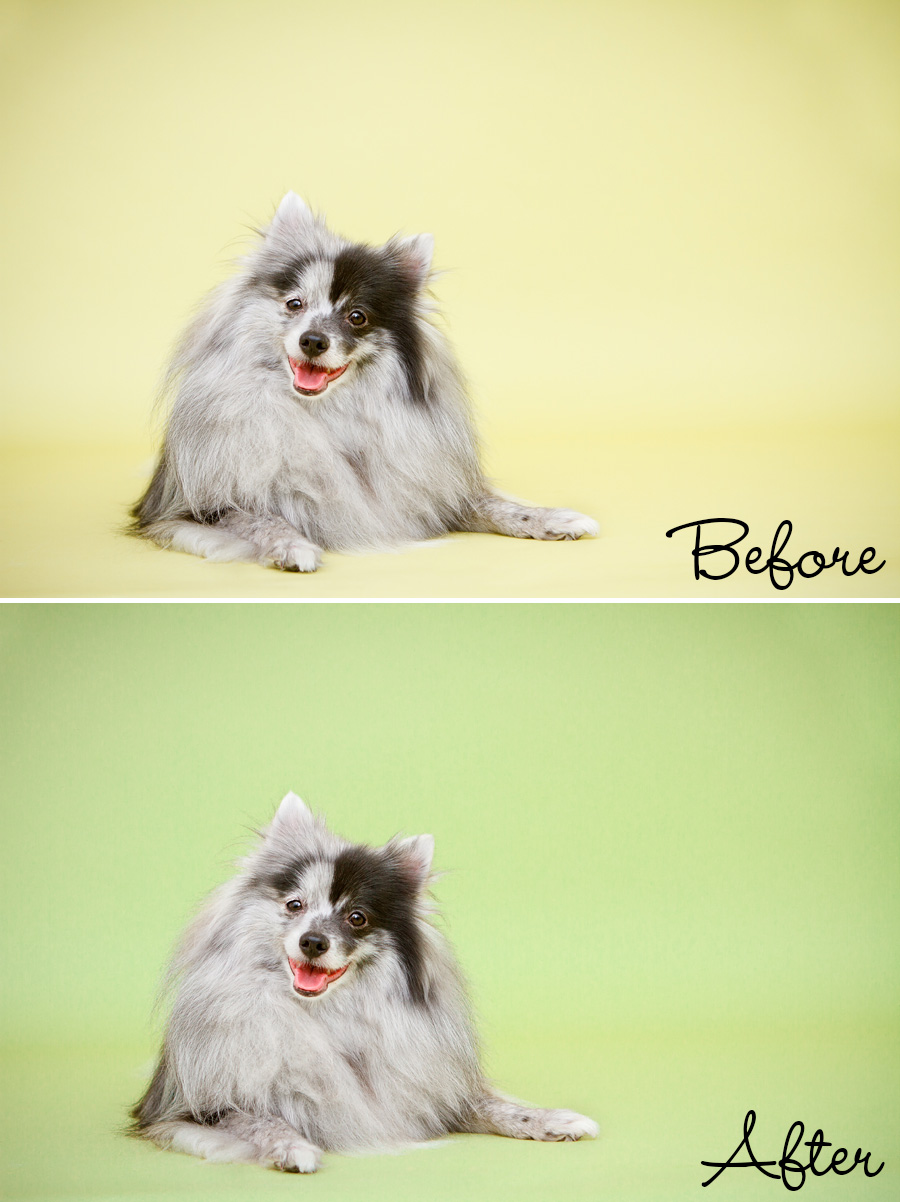
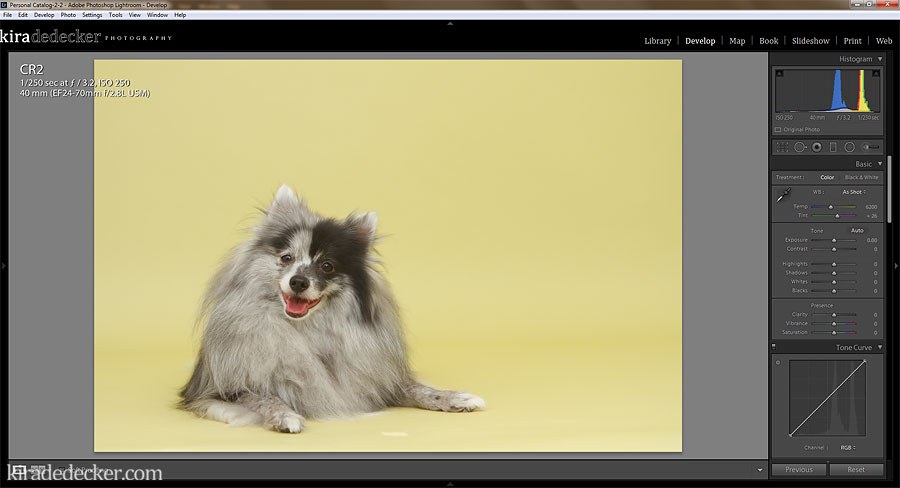 Alrighty, here is the SOOC (Straight Out Of Camera) shot. As you can see, the seamless looks more pee-gold than Sea Green.
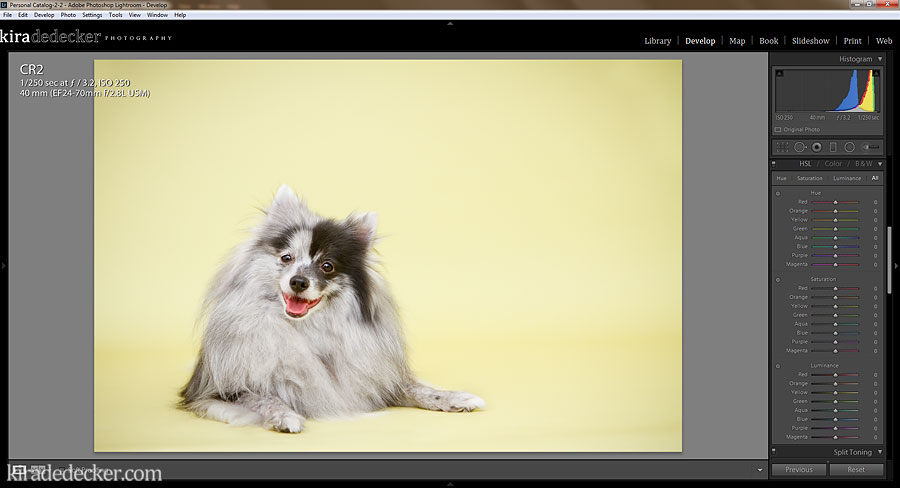 For the RAW edit, I up the Exposure, decrease the Shadows and the Blacks, add some Clarity, add some Saturation (of course), custom color the White Balance, add a touch of contrast with Curves and then top it off with a vignette. Oh, and I also used the Healing Tool to touch up the background and Waffle’s fur.
I now have a nice clean image, and even after I adjusted the White Balance, the background is still more yellow than green. Blerg.
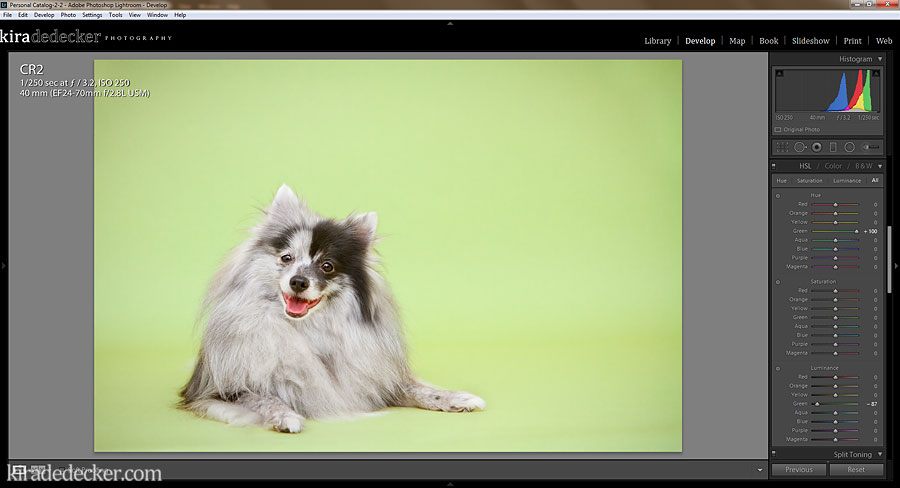 Since I’m going to be color correcting with a certain color in mind, I went next door to my studio and tore off a piece of the seamless I wanted to color match. I scroll down to the HSL/Color/BW section of the Lightroom panel and click All (it’s just easier to have it all open when working with color – but then again, I have a huge screen to work with) and shift the Green Hue towards the blue green instead of yellow. It looked a bit washed out so I went down to Luminance and dragged it back.
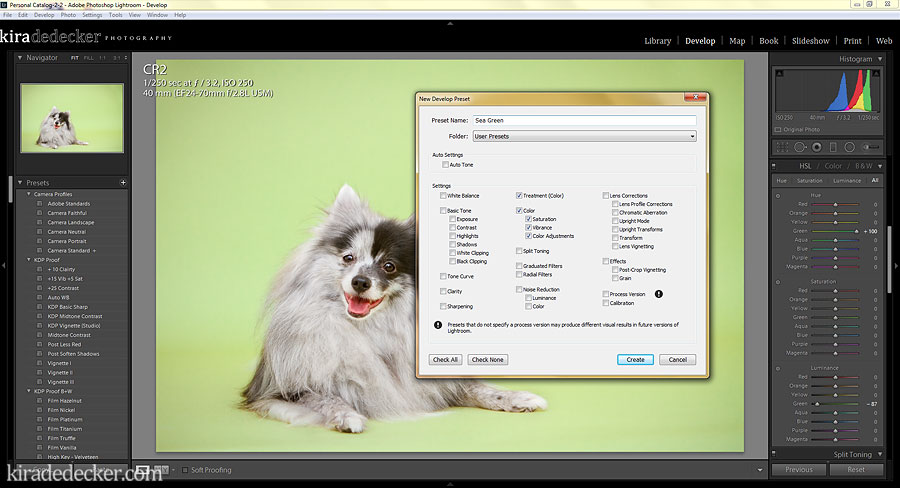 Since this in an ongoing issue, I open the left handed panel and click + to create a new preset. Making sure that I only have the Color selection checked off, I name my new preset and I’m done!
For realsies, it is that easy! Make sure to stick around because I have a follow-up to this on creative uses and some more example photos that I’m going to post tomorrow.
Leave a Reply
Kira DeDecker is an on-location lifestyle pet photographer specializing in one-of-a-kind fine art and modern portraits. She works exclusively with dogs, cats and all other four legged creatures to create vibrant, quirky and soulful works of art.She also photographs needy animals pro-bono for non-profit animal organizations (like Cavalier Rescue USA).
Kira DeDecker Photography is a editorial and commercial pet photographer based in Glendale AZ and serves the Metro Phoenix area (Scottsdale, Peoria, Phoenix, Suncity, Surprise, Goodyear, Avondale and Tempe) and beyond.
Get in Touch!
As Seen On...
Glendale, AZ
623+688+1270
info@kiradedecker.com
www.kiradedecker.com
Heck yeah cute dog pictures! @kiradedeckerphoto
About
The List
The Daily Dog Tag 1,2,3,4,5,6
Hair of the Dog 1,2,3
Pretty Fluffy 1,2
Itty Bitty & Fluffy 1,2,
Healthy Paws
PAWSH Magazine & Studio
Joy Session 1,2,3
Beautiful Beasties 1,2,3,4
Kira DeDecker | info@kiradedecker.com | Arizona Pet Photography
December 21st, 2013 at 12:25 am
Kira,
Once you go to the HSL/Color/BW section and select all, won’t it change the color on the dog as well? I know the dog is black and white, but wouldn’t that affect the white fur color? Thanks for the tutorial!
December 21st, 2013 at 7:06 am
It can, depending on the color of the dog and what colors you are playing with. While Waffles comes in shades of gray and black, he still has pink (mouth, eyes and skin) and brown eyes so I just avoid using the YELLOW, RED and ORANGE – which is something I would do for any color dog really.
http://www.kiradedecker.com/blog/2013/09/simply-color-shift-in-lightroom-followup-and-examples/