Hi, I’m Kira DeDecker (“key-ra dee-decker”) and I’m a pet photographer serving Arizona’s greater Phoenix Metro area. Welcome to my blog! This is where I share not only my most recent work but also my life with you. Client sneak peeks, Facebook recaps, announcements, updates, awesome new offerings and the occasional (okay, frequent) story about my crazy but amazing life with my three dogs – Sox, Bixby and Waffles.
Pull up a chair and make sure it’s nice and comfy because you will want to stay awhile. It’s great to have you here!
explore
Gallery
The Experience
Happy Clients
Get in Touch
I love Photoshop. I know some people snub their noses at the idea of post processing but I personally feel like ever photo needs a finishing touch. It’s essential, especially if you are shooting in RAW format!
My thoughts on retouching and editing is this: it’s the salt and pepper to a well cooked meal – it enhances and adds the finishing touches but doesn’t make it. You can’t cover bad cooking by pouring a lot of salt and pepper on it (that’s just a nice way of saying you can’t polish a turd). I always try to get everything right in camera but sometimes I have to use Photoshop because my best was just…well, not my best or in cases like the one below, things were just out of my control – something all pet photogs understand since our subject are dogs with minds of their own. When that happens I have to do some processing tricks to get the photos where they need to be.
I love this shot. I love the composition of Bella in the corner walking towards the camera and I love the green grass and the pink petals from a nearby tree. But there is one problem with this shot — the background is an ugly unattractive parking lot! Instead of trashing this shot, I imported into Photoshop and did some editing to end up with an image that I love (and that I hope my client will love as well).
(Because it comes up almost every time I post about post processing — I don’t use commercial/bought actions or presets. I’ve tried using them but they’re just not for me. I do, however, use my own actions and presets that I made myself just as a time saver. In general, anything that takes more than two steps I make into an action.)
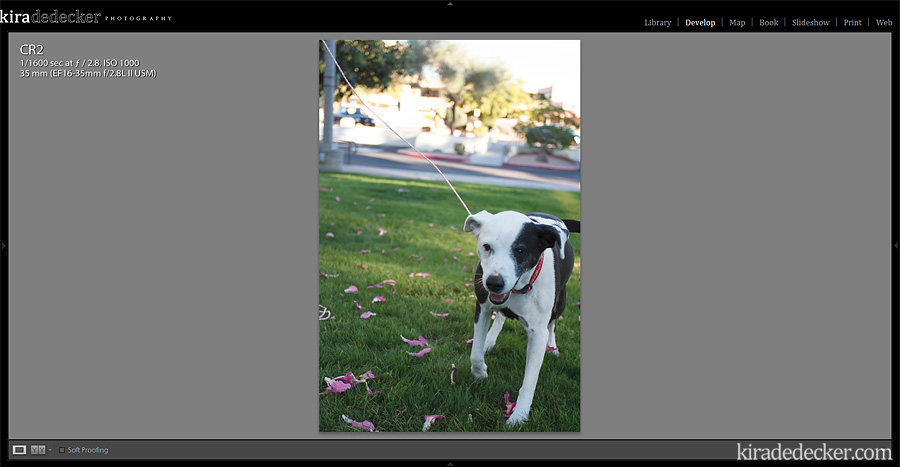 Here is the completely SOOC (Straight out of Camera) shot. I feel naked right now.
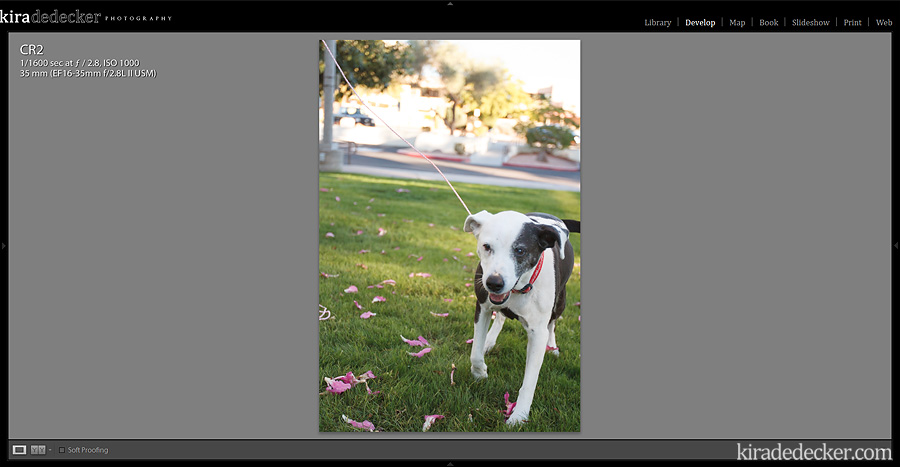 For the RAW edit, I just upped the exposure a bit (+36), lightened the shadows (+10) and color corrected the White Balance.
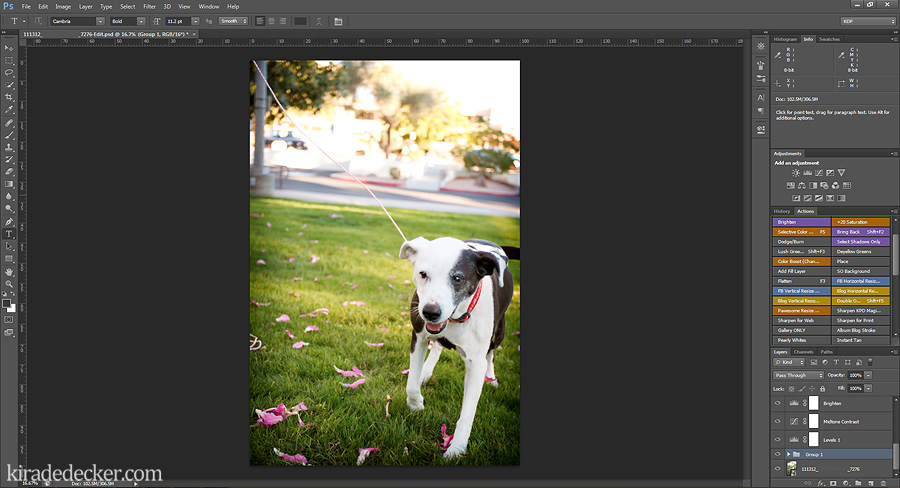 Next, I import the image from Lightroom into Photoshop as a Smart Object and do my usual workflow that includes: contrast, saturation, brightness and a vignette.
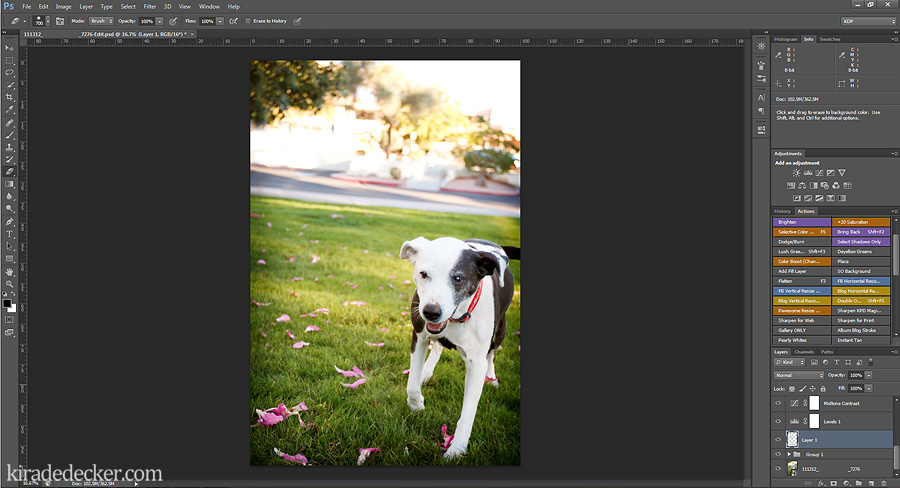 On a new and separate layer I clone out distracting items like the the leash and a few of the dead flowers. I also clean up some of Bella’s eye boogers using the Heal Tool.
Normally, this would be it as far as editing goes, but like I said, I REALLY dislike that parking lot behind Bella.
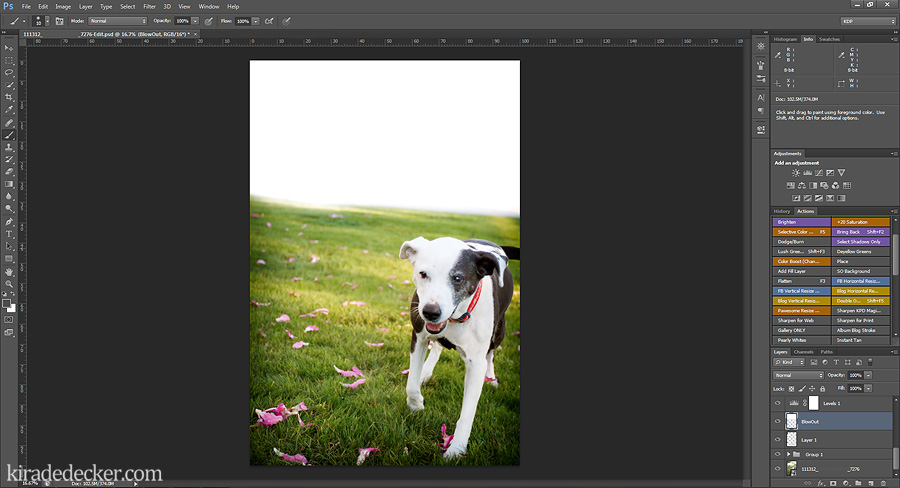 Now here comes the tricky part. Since I’m working with an ugly parking lot and not a blown out sky, I have to fake it. On a new blank and separate layer, I use a soft brush set to white and paint over where I want to put the sky. If you paint over something you want to keep, you can just erase over it since you are on a new layer (plus, using new layers instead of duplicating the original reduces file bloat)
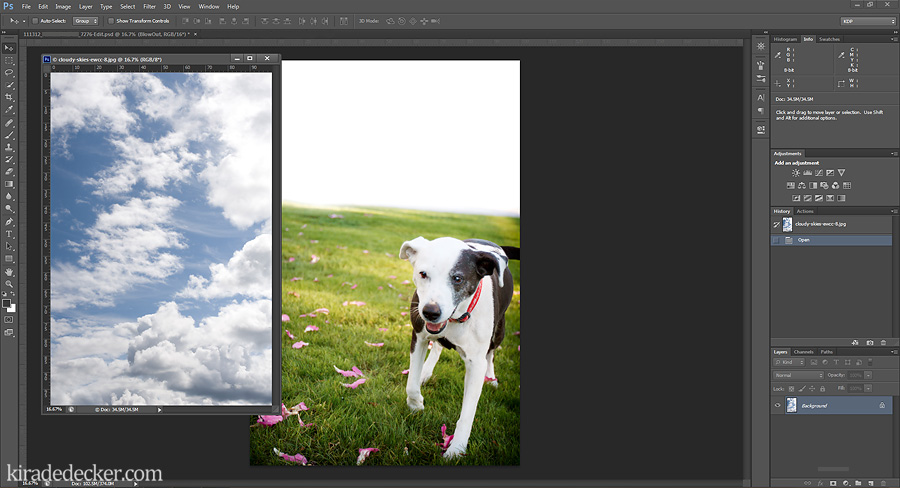 Now here comes the fun part. Find a nice sky overlay for your photo.
Now technically, you can take you own photos of the sky and impose them or grab one from another photo but I live in metro-Phoenix. No one ever comes to the Valley of the Sun and looks up at the sky and says “what nice fluffy clouds you have”, we mostly just have blue cloudless sky here in the desert. Lots of people have skies that you can buy or get for free. In this case, I used EW Coulture’s free Cloudy Skies pack (found here).
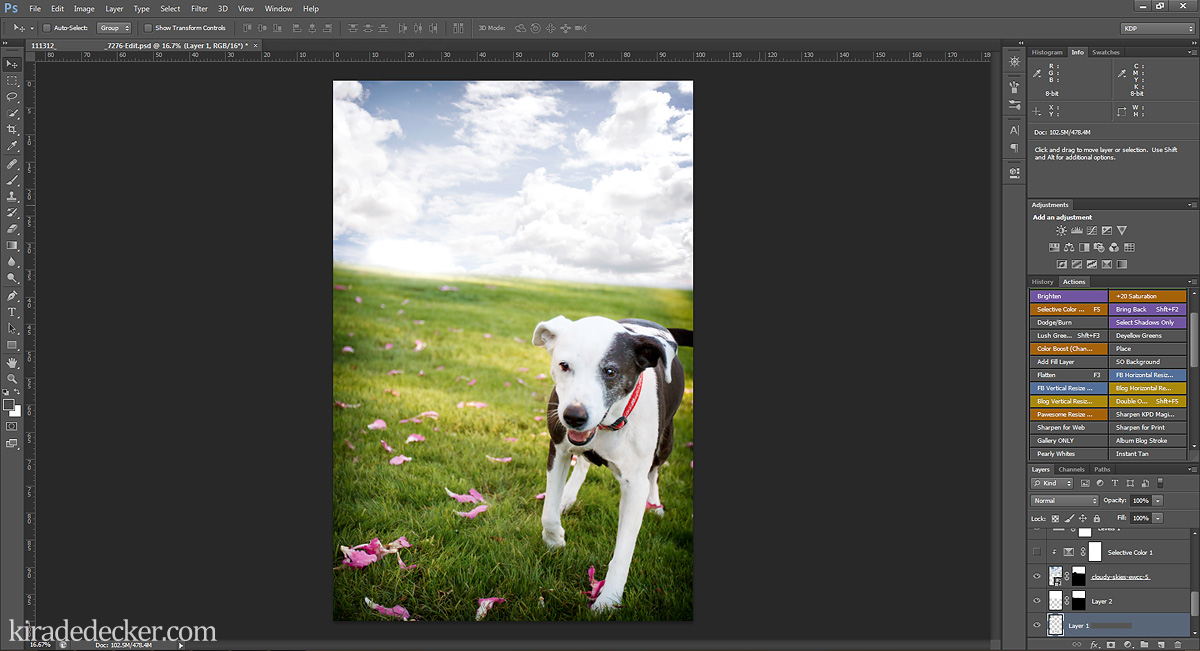 Using the Move tool (shortcut V), I drag and drop the Sky overlay I want and place it in. I put the Sky overlay layer before all my workflow adjustments so it matches the rest of the photo. Next I use a reversed layer mask and and carefully MASKED in the elements I wanted (Never erase from your image unless it’s a new blank layer. You never know when you might need that data back. Masking is your BBF!) I then tweaked with the layer opacity, lowering it to about 62%.
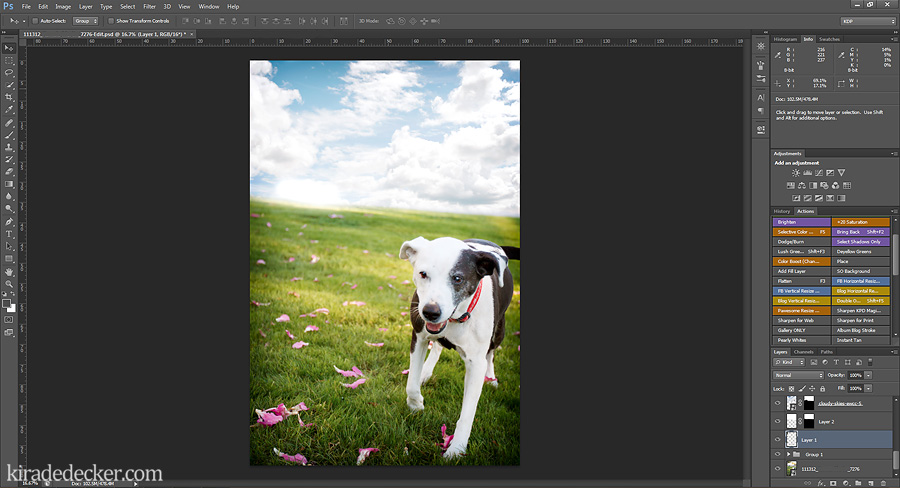 The Sky overlay is where I want, it’s masked in and looks nice and natural but I want the blue in the sky to match the vibrancy of the grass and pink petals. So I make a Selective Color adjustment layer and add more cyan and decrease the magenta and yellows in the blues. Since I don’t want that selective color appling to the entire image, I create a clipping mask to the Sky overlay.
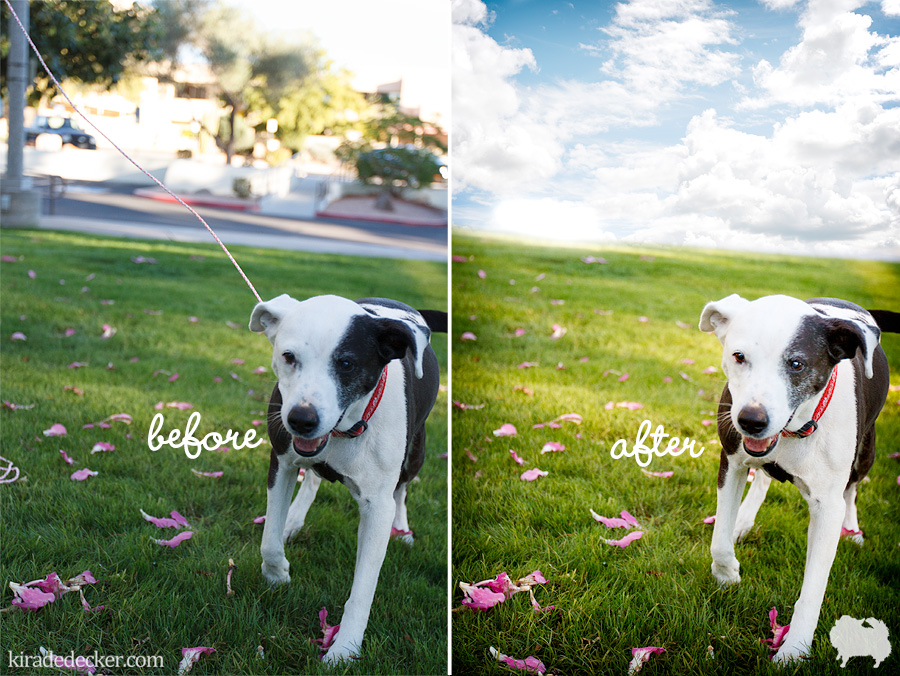 And that’s it! If you need any more tips or advice on post processing, please feel free to contact me. I would be glad to try and help.
Leave a Reply
Kira DeDecker is an on-location lifestyle pet photographer specializing in one-of-a-kind fine art and modern portraits. She works exclusively with dogs, cats and all other four legged creatures to create vibrant, quirky and soulful works of art.She also photographs needy animals pro-bono for non-profit animal organizations (like Cavalier Rescue USA).
Kira DeDecker Photography is a editorial and commercial pet photographer based in Glendale AZ and serves the Metro Phoenix area (Scottsdale, Peoria, Phoenix, Suncity, Surprise, Goodyear, Avondale and Tempe) and beyond.
Get in Touch!
As Seen On...
Glendale, AZ
623+688+1270
info@kiradedecker.com
www.kiradedecker.com
Heck yeah cute dog pictures! @kiradedeckerphoto
About
The List
The Daily Dog Tag 1,2,3,4,5,6
Hair of the Dog 1,2,3
Pretty Fluffy 1,2
Itty Bitty & Fluffy 1,2,
Healthy Paws
PAWSH Magazine & Studio
Joy Session 1,2,3
Beautiful Beasties 1,2,3,4
Kira DeDecker | info@kiradedecker.com | Arizona Pet Photography
November 28th, 2012 at 8:06 pm
Great work! You are a gazillion times better in Photoshop than I am… jealous!
November 28th, 2012 at 11:25 pm
I'm not sure if that's true but thank you!
November 28th, 2012 at 2:27 pm
well this is a pretty awesome tutorial Kira…. and hey! when get puffy white clouds down here in Tucson (sometimes!)
November 28th, 2012 at 4:27 pm
Lucky duck, we seen to only get them during March in my part of town.
November 29th, 2012 at 10:17 pm
You’re so talented Kira! I love love love your work, and its an added bonus that you’re like the sweetest gal ever!
November 30th, 2012 at 12:18 pm
Aww I just got the warm and fuzzies 🙂 Thank you, Sarah!
December 4th, 2012 at 3:05 am
This is awesome! The photo looks amazing. :o)
December 4th, 2012 at 4:03 pm
Nice work! Now you should apply a gaussian blur to the sky to match the blur of the background behind Bella. 🙂
December 7th, 2012 at 3:26 am
Call me crazy but I like the surrealness of the sky as is. (And yes, I just made up the word surrealness.)